Note: As far as I know for now there is no other plant that can be substituted for bamboo. If I find a good substitute I will post it up and let you all know.
We'll start with a list of materials:
- Bamboo
- Small Saw
- Sharp knife
- Steady Hands
Step #1 - Here are the tools we used. Bamboo, kitchen knife, small hack-saw.
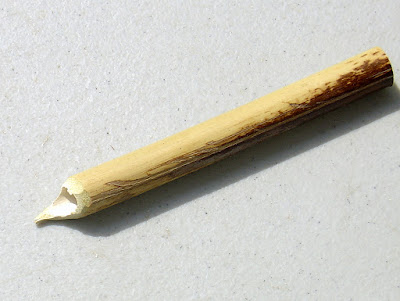
Here's what we're after. The finished dip pen.
Step #2 - Start by cutting a section of bamboo with the saw. Please be careful and don't cut yourself.
Notice that we're cutting of the ring on the bamboo. The ring is not hollow like the rest of the stalk is. You need the hollow part alone for the dip pen to function.
Here's a section. Notice that the top still has a ring on it. We want to cut that off.
Step #3 - Once again, exercise care and go slowlt so you don't wind up with a missing finger...
Step #4 - Next step is to begin carving the bamboo. You take a knife and shave down creating an angled slant getting thinner as it nears the tip.
This is what we're after in the above step.
You'll now notice how wide the tip is. Next step is take it down to the right size.
Step #5 - So, here we are going to shave down the sides of the pen to a more narrow tip.
As you can see, here's the difference between steps #4 and #5. The tip on the right pen is the proper size. Anything bigger and it will most likely drip ink.
Step #6 - Lastly, we need to shave down just a bit off of the bottom of the "nib". Be careful and take just a little off. There should be a white film and that's what you're carving off. Once you hit the actual bamboo wall, stop.
Step #7 - All finished! This bamboo dip pen is ready for hours of fun enjoyment!
Underside of the nib.
Sitting on a good notebook!
This little pen just can't wait to start writing!
Writing Samples!
Fading is not to bad on this. Much better than a conventional steel-nibbed dip-pen!
It's a wet and juicy writer which I love!
Doing some S's.
Another last shot just for fun!
I hope you've enjoyed this tutorial and mainly, that it's proved useful to you. Like I said, I haven't come up with a substitute for those without bamboo yet. I'm thinking though...
Please, drop me a comment and let me know what you think of this tutorial!
Regards,
777 - Tyler Dahl


Hi Tyler, I think a writing sample would be revealing...
ReplyDeleteWriting samples added! Thanks for reminding me Greg, I forgot about those. Very important part though!
ReplyDeleteRegards,
777 - Tyler Dahl
That was cool. It almost looks like an italic nib. I wonder if the tip wears off quickly. What ink are you using? It looks a lot like my Navajo Turquoise.
ReplyDeleteYea, they can be cut to different shapes for even more fun! I made an XF nib on one and it worked really well. The problem is as you guessed, the tip wears off somewhat quickly on the smaller ones (XF, F, M). The big broad tips don't wear as quickly and are still very fun to write with.
ReplyDeleteThe ink is indeed Noodlers Navajo Turquoise! However, I dilute mine 50% with water to make it more like turquoise. Apparently some batches of the ink are darker than others and mine was a dark batch... Looks great this way and makes the ink cost 1/2 as much!
Regards,
777 - Tyler Dahl
Haha damn I'm good! The color in my avatar is Navajo Turquoise. It looks good diluted, I have to say.
ReplyDeleteI have found that it looks darker with broader nibs but if you use a fine nib it comes close to your diluted version.
Yup, good guess!
ReplyDeleteYes, I love the look of it diluted and of course, like I said, it lowers the cost of the ink considerably!
Regards,
777 - Tyler Dahl
Another great tutorial, Tyler. I wonder if I can find some bamboo.
ReplyDeleteYes, that seems to be the common problem. It's hard to get a hold of a good stash of bamboo... I think some furniture stores actually sell little bamboo plants for decoration. Might be a place to look...
ReplyDeleteRegards,
777 - Tyler Dahl
Ciertamente no es necesario hacerlo con un bambú natural. Se puede usar cualquier rama delgada de un árbol o también utensilios de cocina hechos de bambú. Yo me hice uno de una vieja pala de cocina y funciona de maravilla.
DeleteGracias igualmente por compartir estos gustos. Saludos
Terrific tutorial. Now I'll have to find some bamboo in the storm. :)
ReplyDeleteHi, I was told that cleaning the pen with saliva won't kill the pen as fast as water. Do you have any comments on that? Thanks!
ReplyDeleteWow.. this is amazing gear ... Loves it
ReplyDelete